Flutter
There are two available modes for Flutter testing. To start testing, you must first configure your repository.
Please adhere to the repository naming convention:
⚠️ One application per repository!
Follow this naming convention:
(courseCode)-flutter-hw[0..9]
Examples: * ICD0022-flutter-hw0 * ICD0022-flutter-hw7
Configure your repository
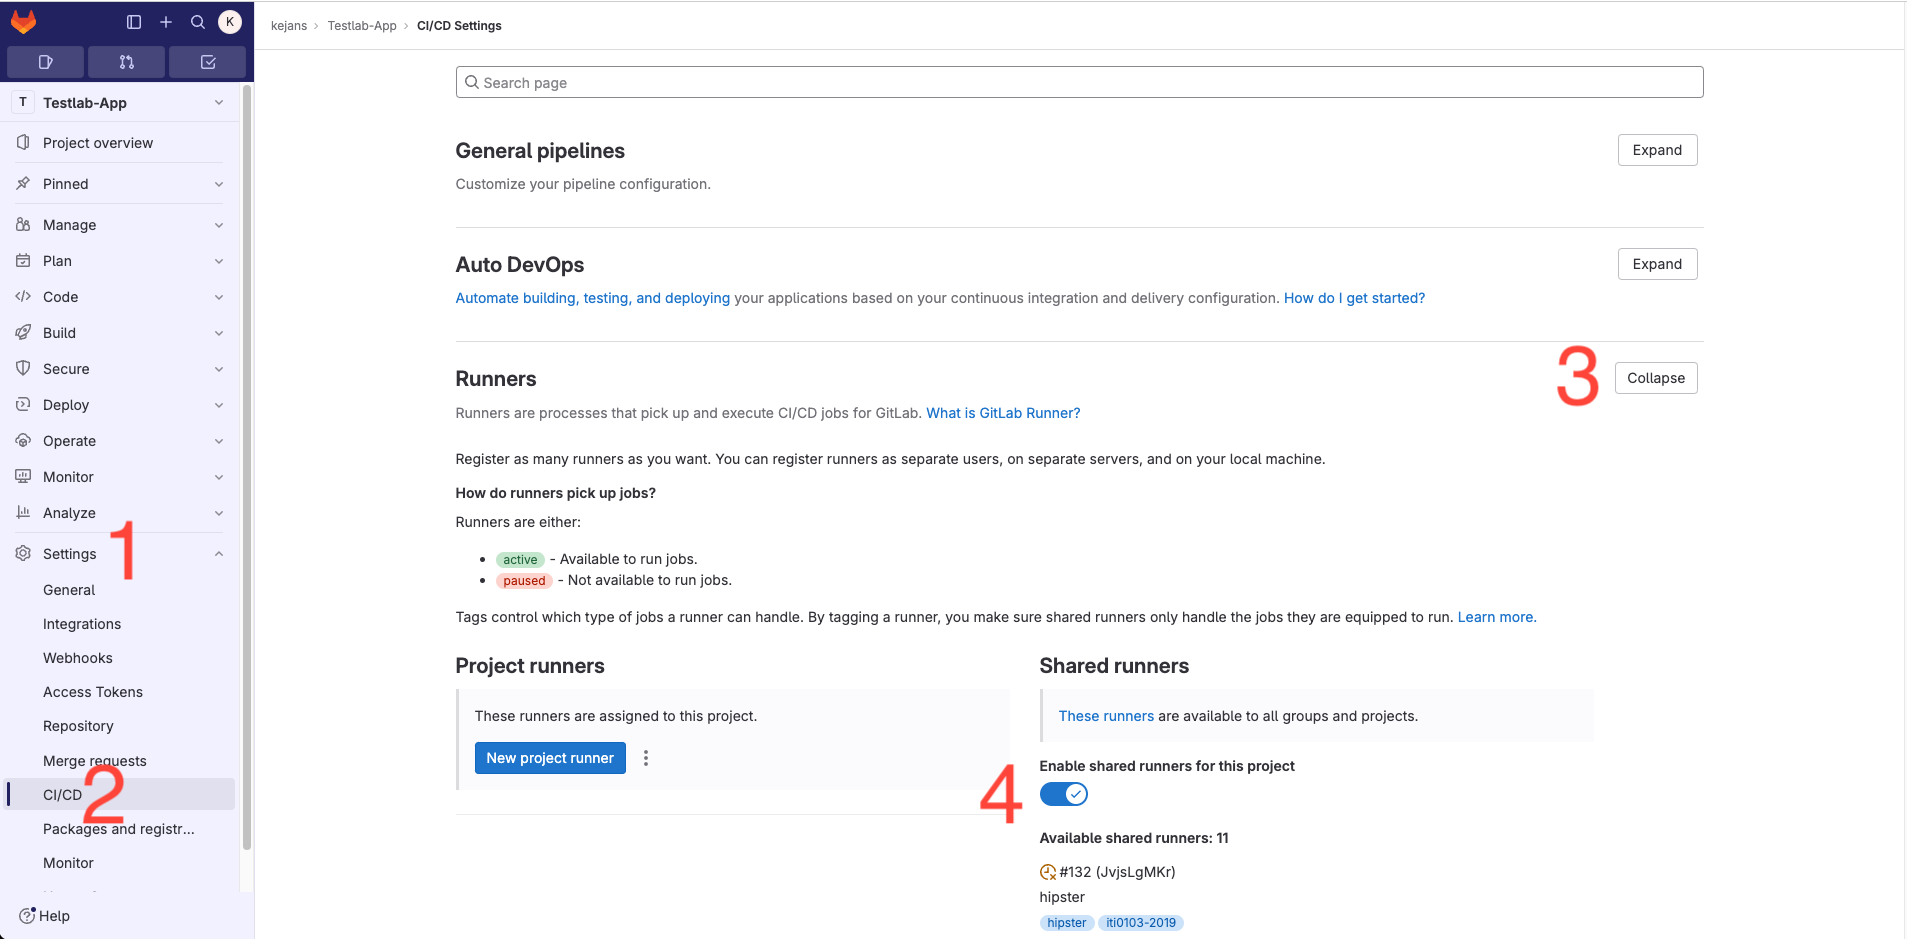
1. Enable Shared Runner
Go to Settings → CI/CD → Runners → Expand → Enable Shared Runners
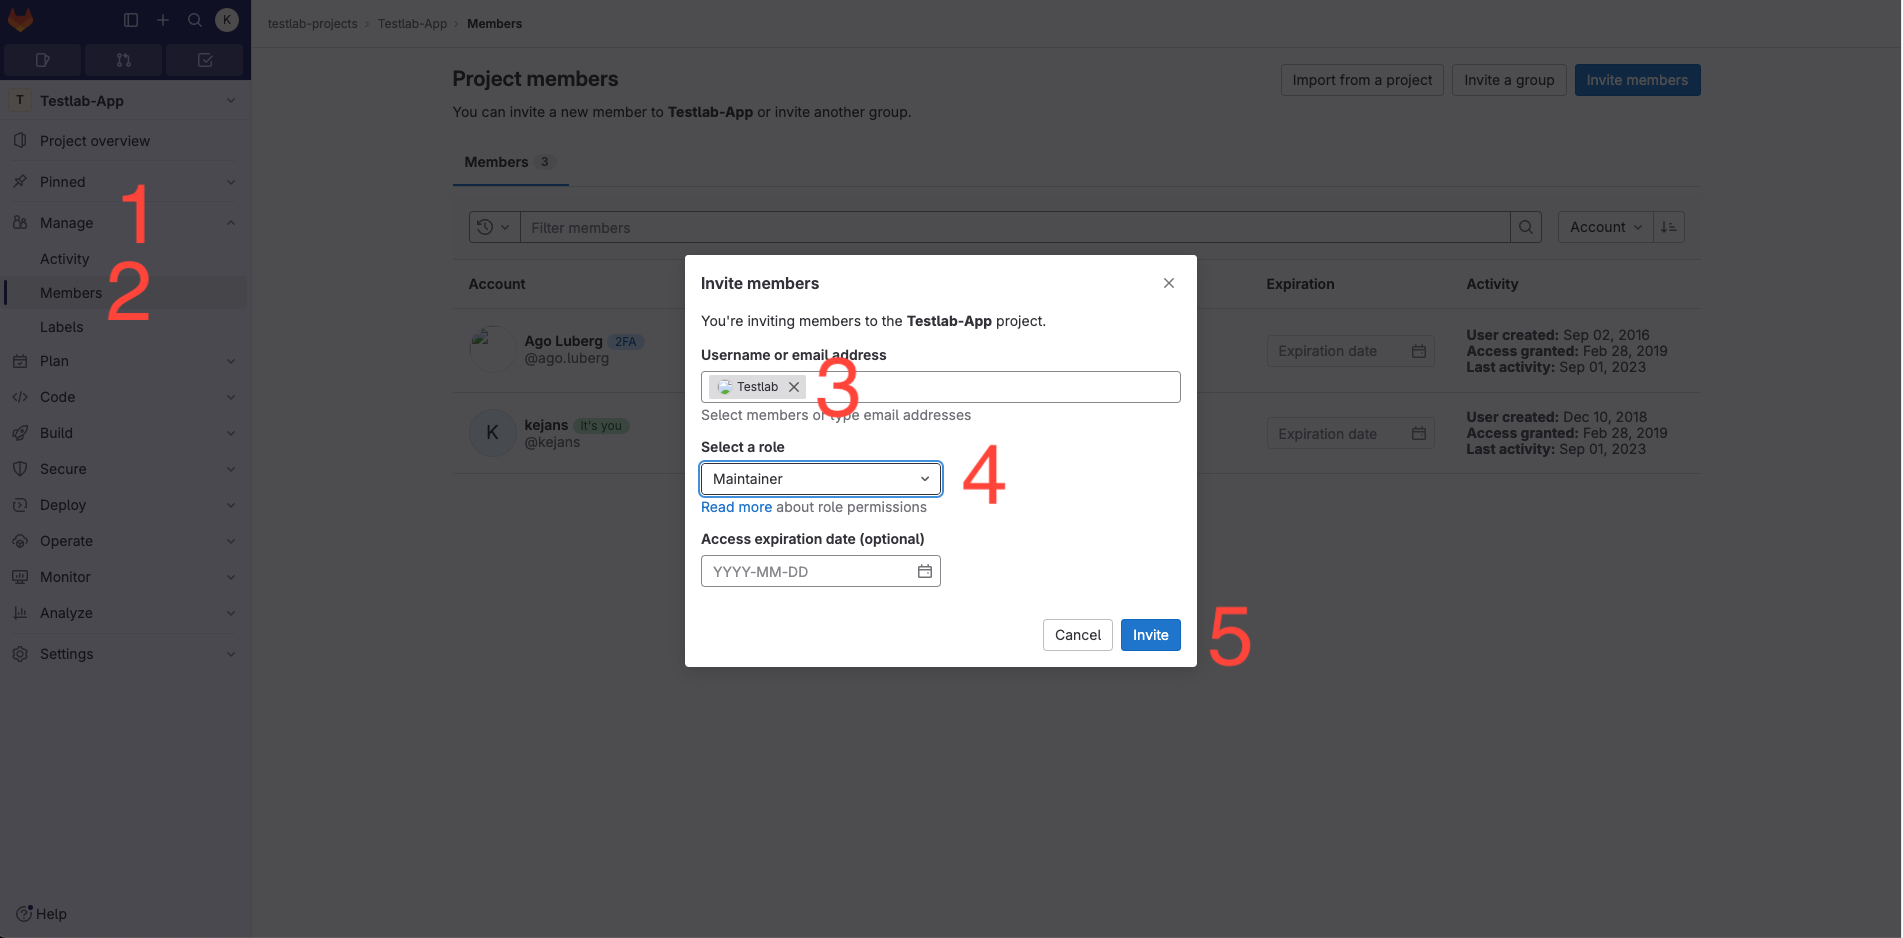
2. Add user @testlab with Maintainer permission to the repository
Navigate to Members, add @testlab with Maintainer permission, then click Invite.
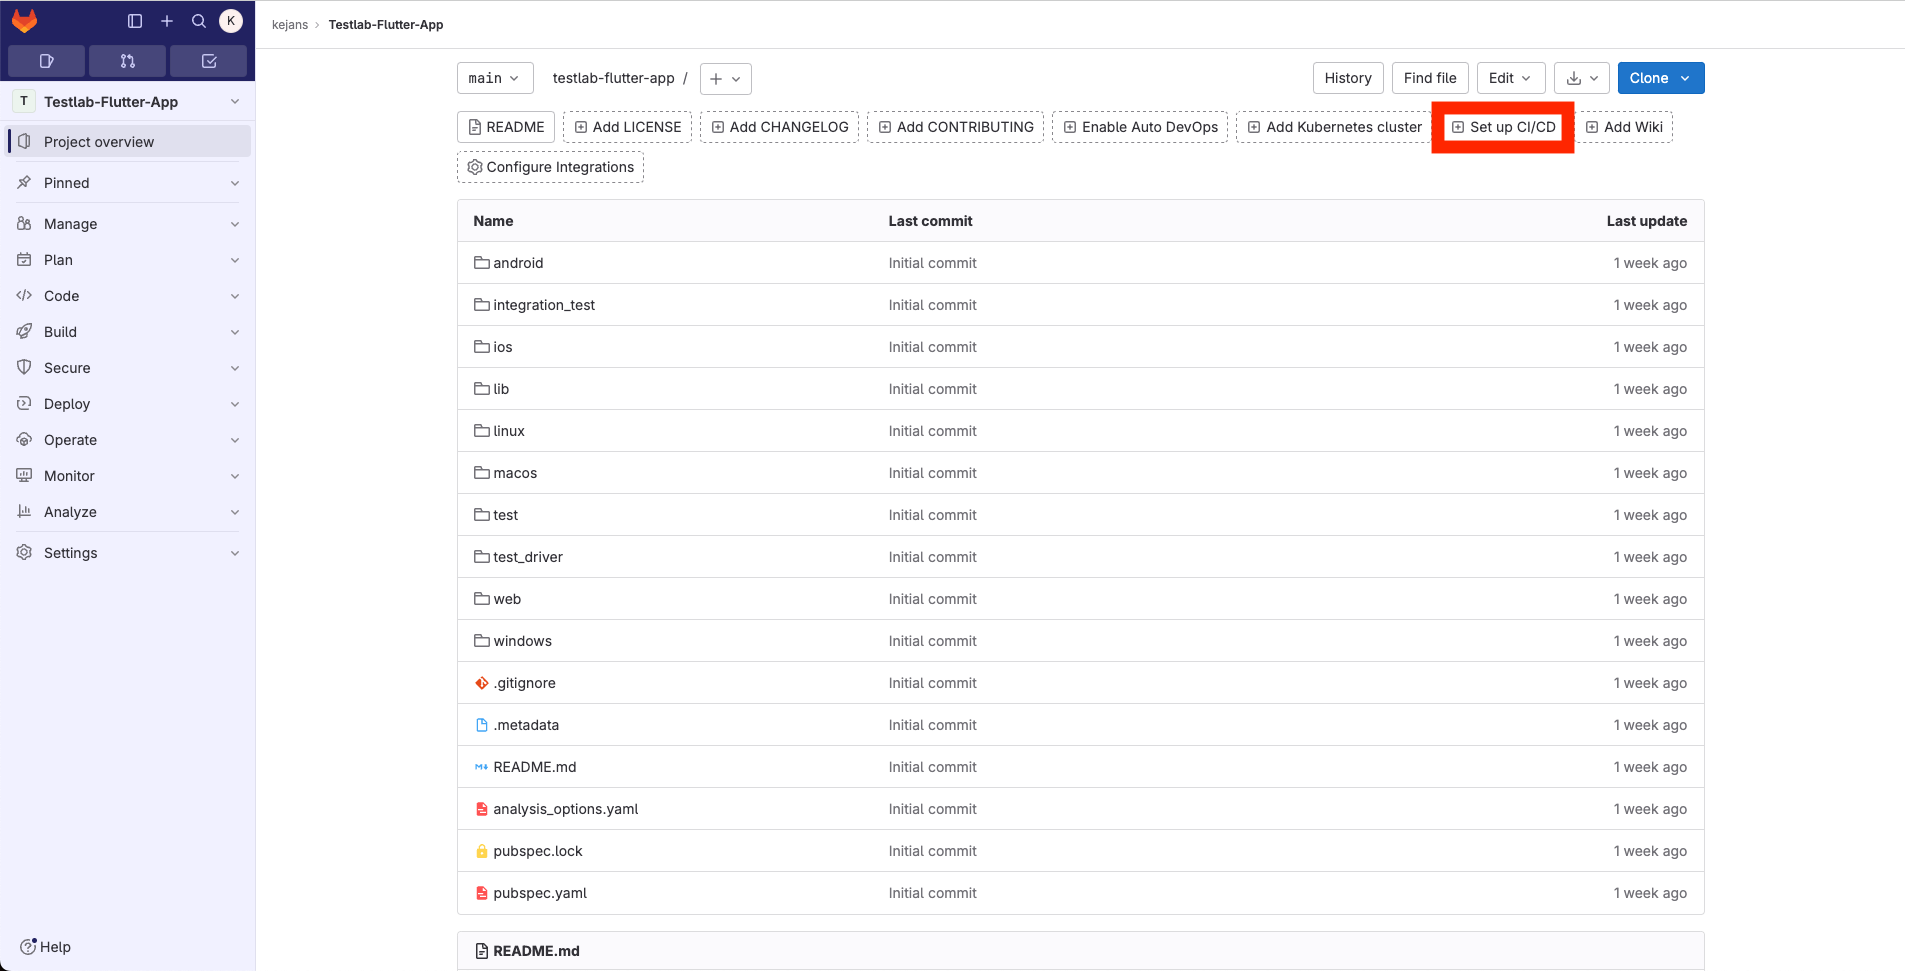
3. Commit your application source code
⚠️ Ensure there is only one app per repository.
Your repository structure should resemble the following. Then click "Setup CI/CD"
4. Based on your requirements, replace the script of your .gitlab-ci.yml file
Click "Configure pipeline."
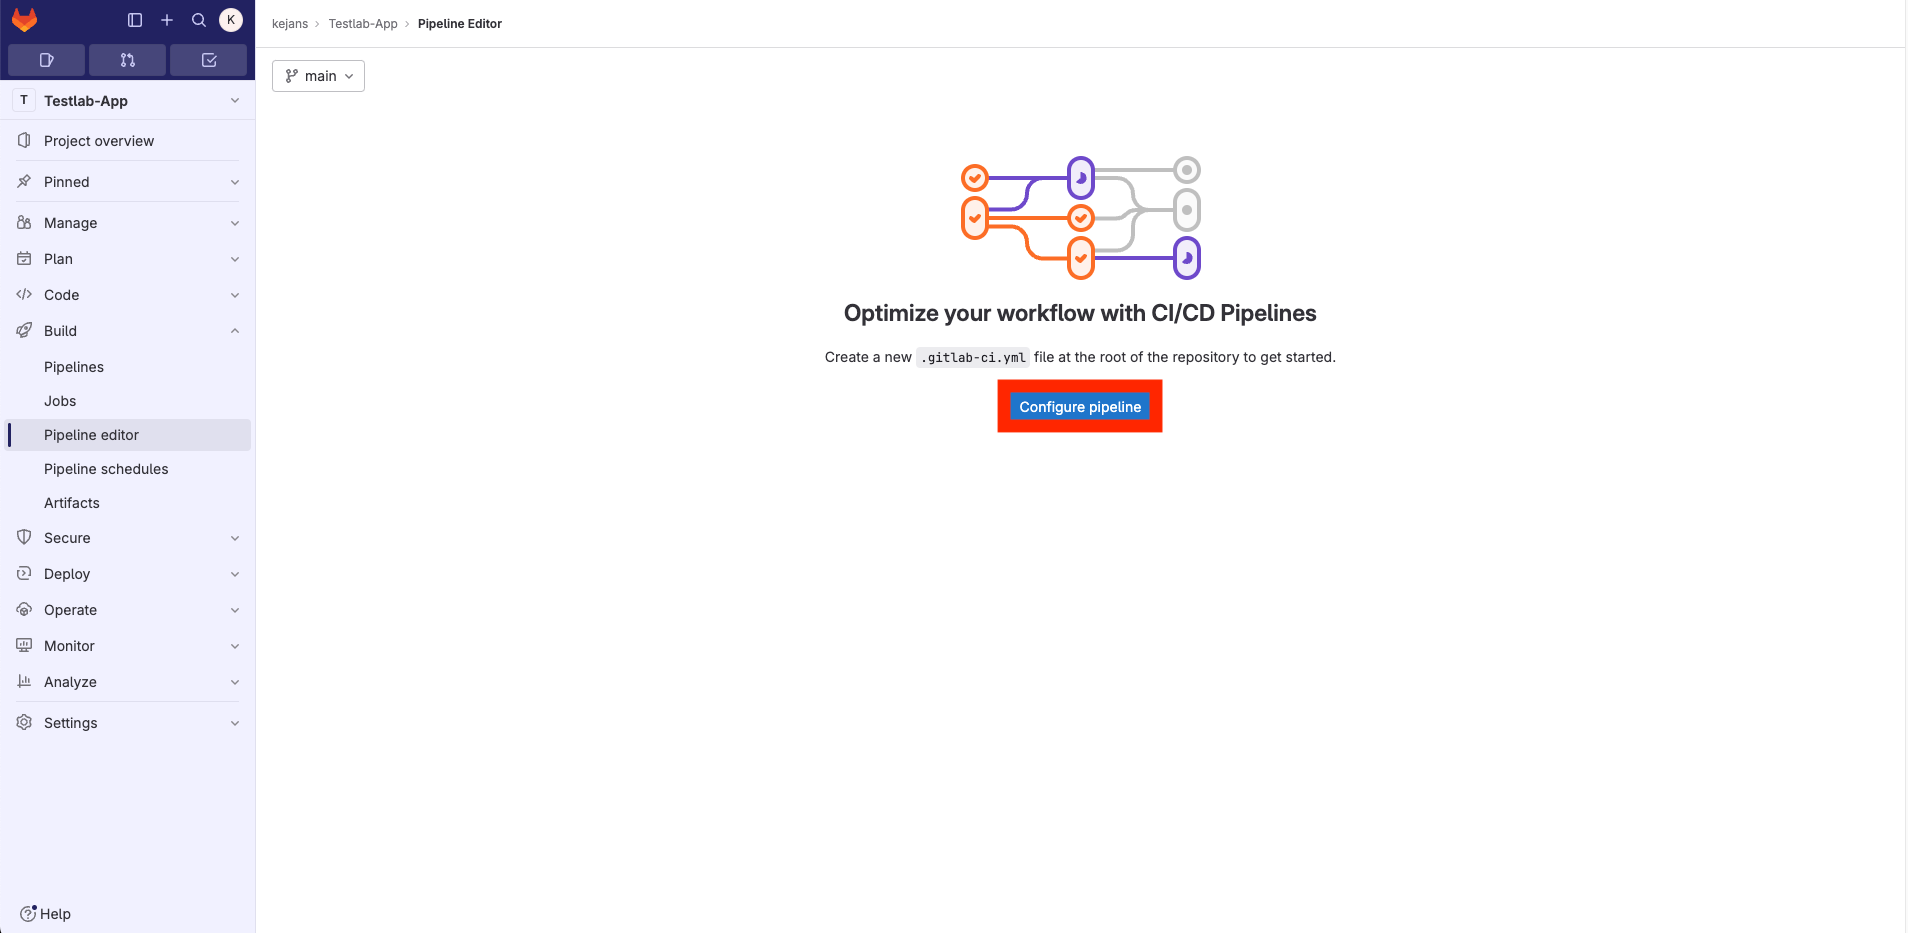
Depending on the test you'd like to run, click the link below and copy the .gitlab-ci.yml script to your .gitlab-ci.yml, then commit it.
Screenshot test - Use it to verify that your app compiles and runs on devices. It is good for testing Single Page Applications.
Flutter UI test - Use it to run your written FlutterUI tests on devices.
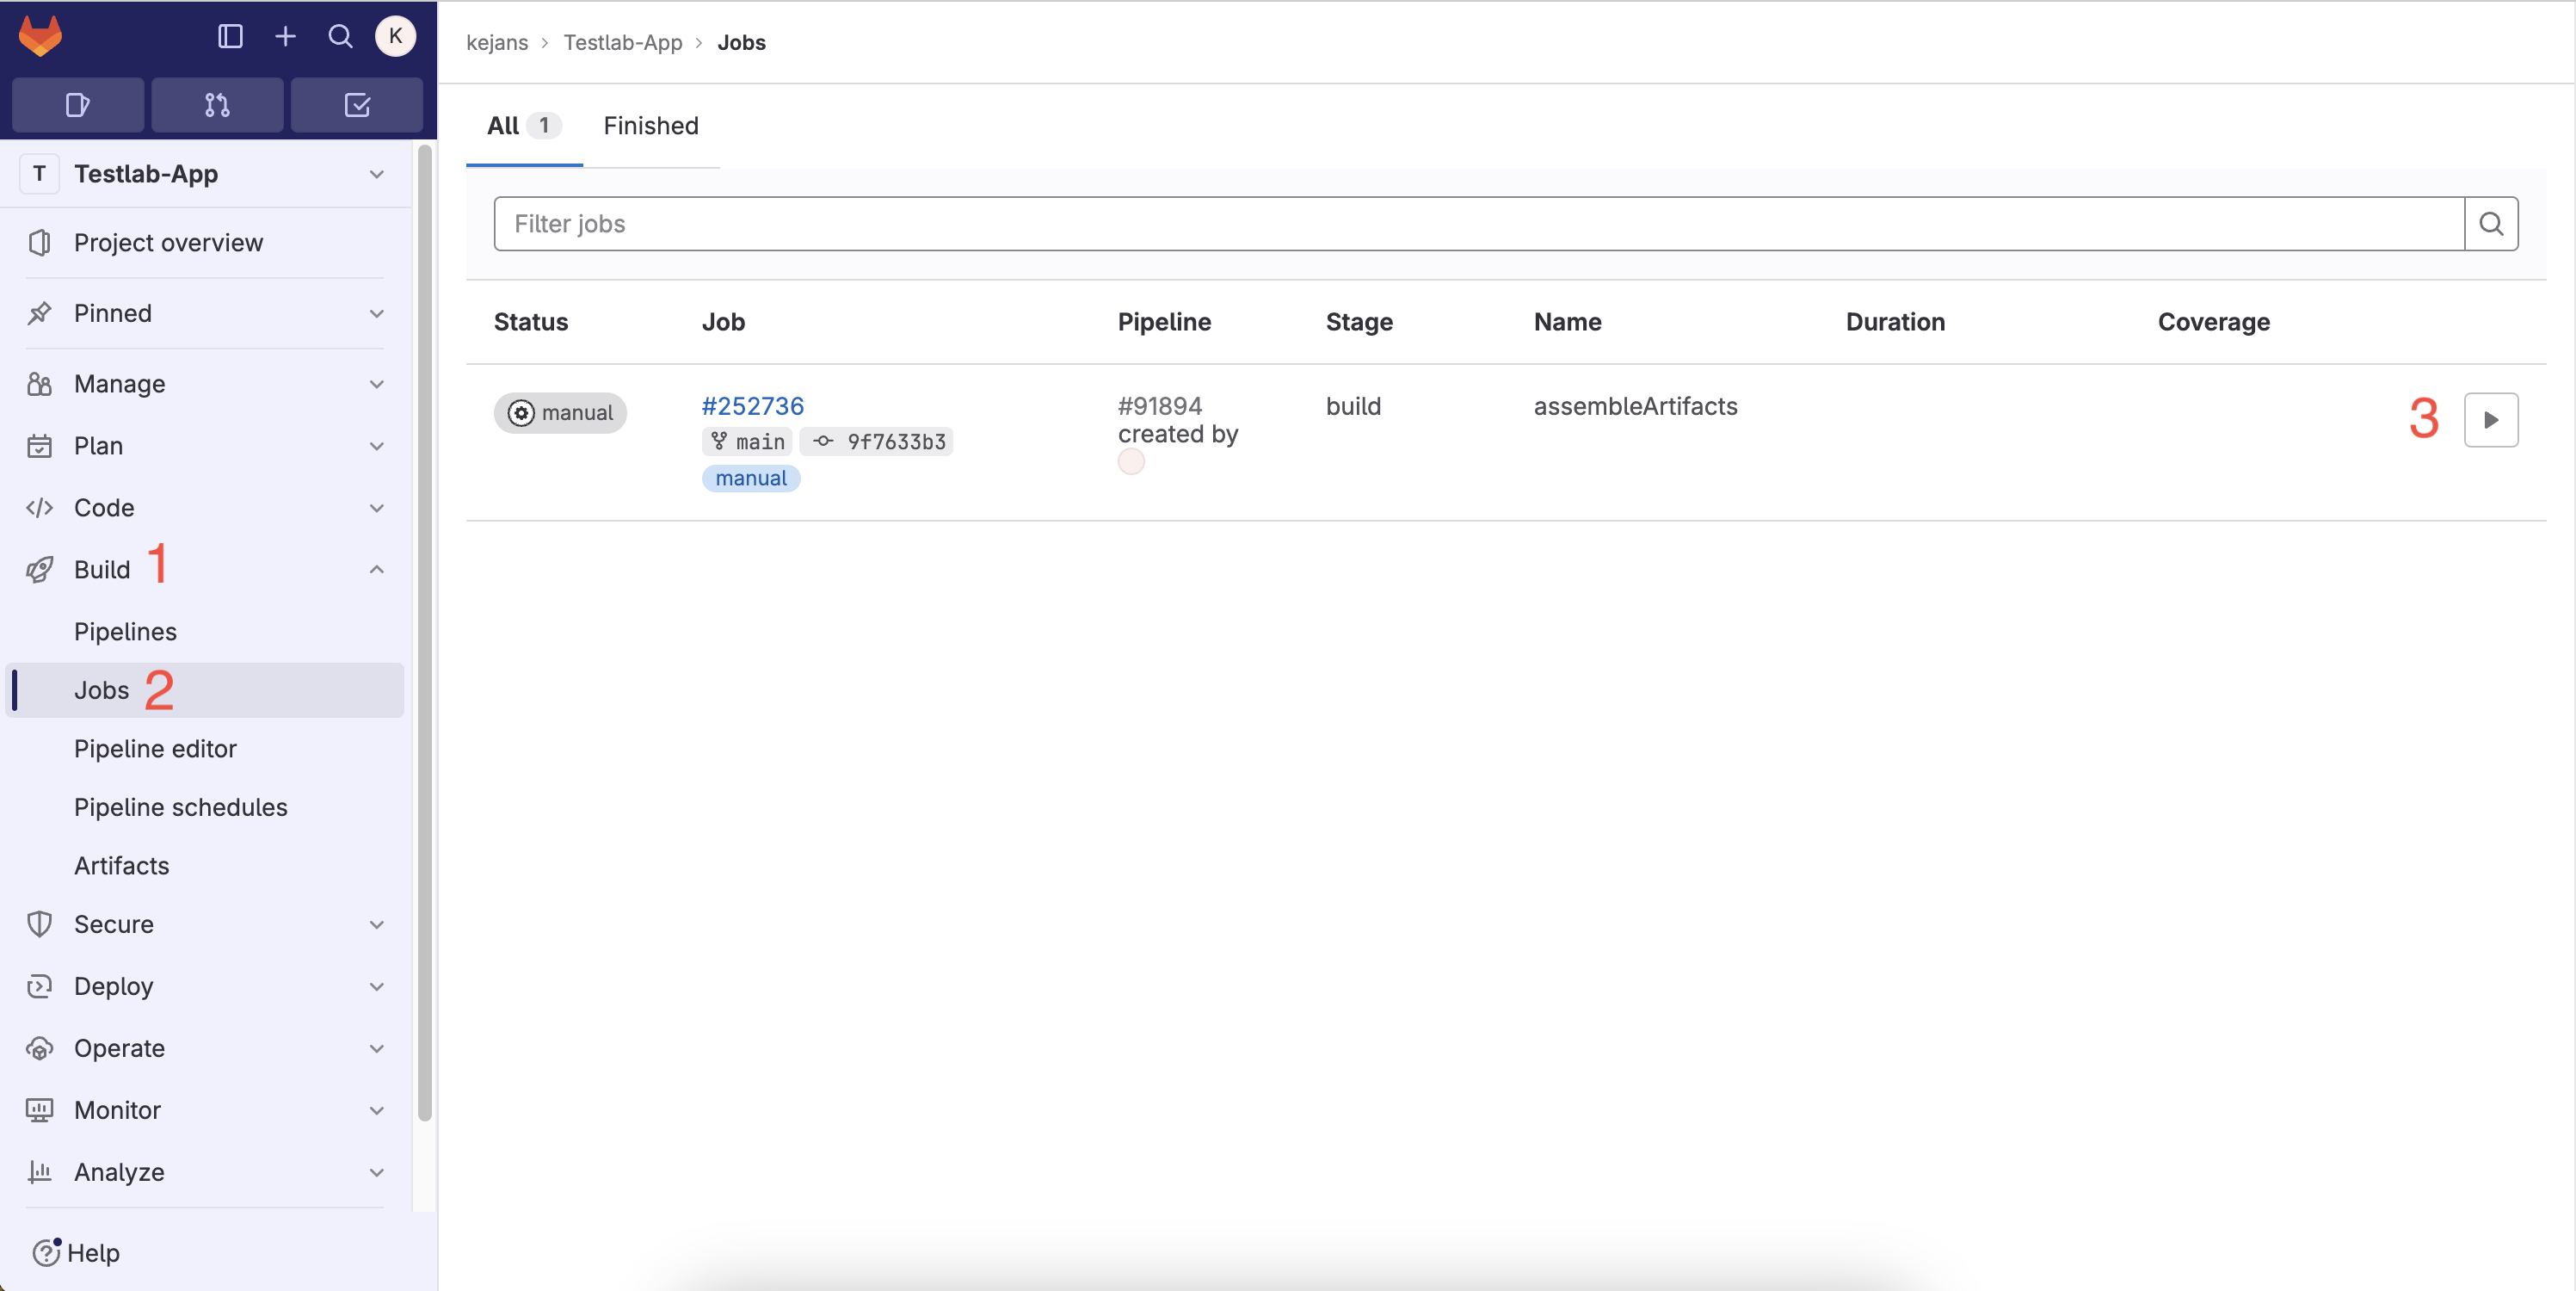
5. Next, navigate to CI/CD and initiate your job
Go to Build-> Jobs and click ▶️
After clicking ▶️, the pipeline will start. You must manually start the pipeline each time you commit and push your code to GitLab. The pipeline usually takes between 5 to 30 minutes to run. You'll receive your test results at your UNIID email.
6. Congratulations, you did it! 🤩🤩
If you don't receive your results within 30 minutes, contact me on Teams (Kevin Janson) or at testlab@ttu.ee.
Happy coding!!
Screenshot Testing
This testing approach is automated and doesn't require you to write any tests. The script takes care of compiling your code and installing it on all accessible devices in Testlab. It captures screenshots in both portrait and landscape orientations. This is particularly useful for testing Single Page Applications or for verifying that your app installs correctly on various devices. To utilize this service, copy the following content into your .gitlab-ci.yml script
image: ghcr.io/cirruslabs/flutter:3.29.2

cache:
  key: "${CI_COMMIT_REF_SLUG}"
  paths:
    - android/gradle
    - .pub-cache/

flutterScreenshotTest:
  script:
    - flutter build apk --debug
    - mkdir -p artifacts
    - mv build/app/outputs/flutter-apk/app-debug.apk artifacts/app-debug.apk
    - |
      curl -X POST --location "https://testlab.taltech.ee/testlab/startTest" \
        -F "platform=flutter" \
        -F "reportType=screenshot" \
        -F "apkFile=@artifacts/app-debug.apk" \
        -F "email=${GITLAB_USER_EMAIL}" \
        -F "repositoryName=${CI_PROJECT_NAME}"
UI Testing
This type of testing requires you to write XCUITest tests. Copy this file to your .gitlab-ci.yml script to start using this service.
Remember to change your TEST_NAME to you test file.
```yaml title=.gitlab-ci.yml variables: TEST_NAME: "integration_test/app_test.dart" #Change it to your test name
flutterUITest: script: - | curl -X POST --location "https://testlab.taltech.ee/testlab/startTest" \ -F "platform=flutter" \ -F "reportType=flutterui" \ -F "email=${GITLAB_USER_EMAIL}" \ -F "projectURL=${CI_PROJECT_URL}" \ -F "repositoryName=${CI_PROJECT_NAME}" \ -F "testName=${TEST_NAME}"
```
🔗 Check out these links 🔗